Flutter 一切谐为组件!

本篇主要涉及的组件有:
- Menu - 菜单
- Picker - 日期时间组件
- Progress - ProgressIndicator - 进度条组件
- Radio
- Scanffold - Material 布局组件
- Scroll - PageView - 滑动页面
- Slider - 滑块
- Spacing - AnimatedPadding - 带动画的内边距
- Stack - 层叠组件
- Switch
- Table - 表格组件
- Text
- Theme - MaterialApp - Material 应用
一、Menu - 菜单
1.1 CheckedPopupMenuItem - 选中弹出菜单
dependencies:
  flutter:
    sdk: flutter

  # The following adds the Cupertino Icons font to your application.
  # Use with the CupertinoIcons class for iOS style icons.
  cupertino_icons: ^0.1.2
  image_picker: ^0.4.10
  fluttertoast: ^2.2.2
class DemoPageState extends State<DemoPage> {

  //已选择的菜单项
  List<String> _checkedValues;

  final String _checkedValue1 = 'One';
  final String _checkedValue2 = 'Two';
  final String _checkedValue3 = 'Three';
  final String _checkedValue4 = 'Four';

  @override
  void initState(){
    super.initState();
    //初始化已选中的项
    _checkedValues = <String>[_checkedValue2];
  }

  //检测传入的值是否在_checkedValues里
  bool isChecked(String value) => _checkedValues.contains(value);

  void showCheckedMenuSelections(String value){
    if(_checkedValues.contains(value)){
      _checkedValues.remove(value);
    }else{
      _checkedValues.add(value);
    }
    showInSnackBar('Checked $_checkedValues');
  }

  //弹出已选择的项
  void showInSnackBar(String value){
    Fluttertoast.showToast(
        msg: value,
      toastLength: Toast.LENGTH_SHORT,
      backgroundColor: Colors.grey,
      textColor: Colors.white,
    );
  }


  @override
  Widget build(BuildContext context) {
     return Container(
       color: Theme.of(context).primaryColor,
       child: ListTile(
         title: Text('有选择标记的弹出菜单',style: TextStyle(color: Colors.white),),
         trailing: PopupMenuButton<String>(
           padding: EdgeInsets.zero,
           onSelected: showCheckedMenuSelections,
           //弹出按钮图标
           icon: Icon(Icons.menu,color: Colors.white,),
           itemBuilder: (BuildContext context) =><PopupMenuItem<String>>[
             //有选择标记的弹出菜单项
              CheckedPopupMenuItem<String>(
                value: _checkedValue1,
                checked: isChecked(_checkedValue1),
                child: Text(_checkedValue1),
              ),
              CheckedPopupMenuItem<String>(
                value: _checkedValue2,
                //当前项是否可点击
                enabled: false,
                //当前项是否被选中
                checked: isChecked(_checkedValue2),
                child: Text(_checkedValue2),
              ),
              CheckedPopupMenuItem<String>(
                value: _checkedValue3,
                checked: isChecked(_checkedValue3),
                child: Text(_checkedValue3),
              ),
              CheckedPopupMenuItem<String>(
                value: _checkedValue4,
                checked: isChecked(_checkedValue4),
                child: Text(_checkedValue4),
              ),
           ],
         ),
       ),
     );
  }

}
1.2 DropdownMenuItem - 下拉菜单项
class DemoPageState extends State<DemoPage> {

  String dropdownValue = 'One';

  @override
  Widget build(BuildContext context) {
    return Center(
      child: ListTile(
        title: Text('下拉菜单按钮'),
        trailing: DropdownButton(
          value: dropdownValue,
          onChanged: (String val) {
            setState(() {
              dropdownValue = val;
            });
          },
          //渲染所有菜单项
          items: <String>['One','Two','Three','Four'].map<DropdownMenuItem<String>>((String value){
            //渲染每一个可选项
            return DropdownMenuItem<String>(
              value: value,
              child: Text(value),
            );
          }).toList(),
        ),
      ),
    );

  }

}
1.3 PopupMenuButton - 弹出菜单按钮
当菜单隐藏式,点击或调用onSelected时显示一个弹出式菜单列表

class DemoPageState extends State<DemoPage> {

  void printSelectValue(String value){
    print(value);
  }

  @override
  Widget build(BuildContext context) {

    return Container(
      child: ListTile(
        title: Text('弹出菜单按钮'),
        //弹出菜单按钮
        trailing: PopupMenuButton<String>(
          padding: EdgeInsets.zero,
          //选择回调
          onSelected: printSelectValue,
          //菜单项构造器
          itemBuilder: (BuildContext context) => <PopupMenuEntry<String>>[
            //弹出菜单项
            PopupMenuItem<String>(
              value: '锁定会议',
              child: ListTile(
                leading: Icon(Icons.lock),
                title: Text('锁定会议'),
              ),
            ),
            PopupMenuItem<String>(
              value: '挂断会议',
              child: ListTile(
                leading: Icon(Icons.phone),
                title: Text('挂断会议'),
              ),
            ),
            //弹出菜单分隔线
            PopupMenuDivider(),
            PopupMenuItem<String>(
              value: '全部静音',
              child: ListTile(
                leading: Icon(Icons.volume_mute),
                title: Text('全部静音'),
              ),
            ),
          ],
        ),
      ),
    );

  }

}
二、Picker - 日期时间组件
日期&时间选择器
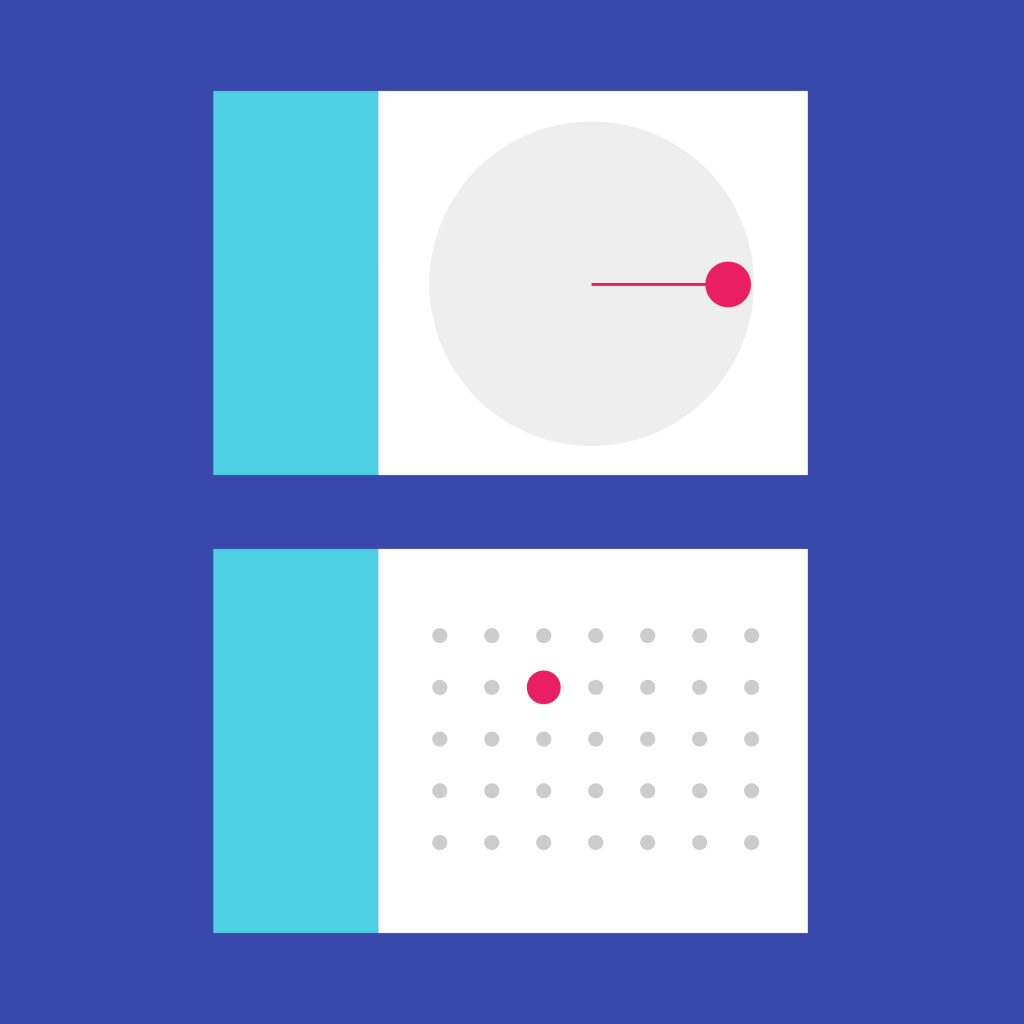
class DemoPageState extends State<DemoPage> {

  DateTime _date = new DateTime.now();
  TimeOfDay _time = new TimeOfDay.now();

  Future<void> _selectDate(BuildContext context) async {
    final DateTime picked = await showDatePicker(
        context: context,
        //初始日期
        initialDate: _date,
        //起始日期
        firstDate: DateTime(2019,1),
        //结束日期
        lastDate: DateTime(2020));
        if(picked != null && picked != _date){
          print('当前选择的日期是:${_date.toString()}' );
        }
        setState(() {
          _date = picked;
        });


        if(picked == null){
          _date = new DateTime.now();
        }

  }


  Future<void> _selectTime(BuildContext context) async {
    final TimeOfDay picked = await showTimePicker(
        context: context,
      initialTime: _time,
    );
    if(picked != null && picked != _time){
      print('当前选择的时间是:${_time.toString()}' );
    }
    setState(() {
      _time = picked;
    });


    if(picked == null){
      _time = new TimeOfDay.now();
    }

  }

  @override
  Widget build(BuildContext context) {
    return Center(
      child: Column(
        children: <Widget>[
          Text('日期选择'),
          RaisedButton(
            child: Text('日期选择结果:${_date.toString()}'),
            onPressed: (){
              _selectDate(context);
            },
          ),
          Text('时间选择'),
          RaisedButton(
            child: Text('时间选择结果:${_time.toString()}'),
            onPressed: (){
              _selectTime(context);
            },
          ),
        ],
      ),
    );
  }

}
三、Progress - ProgressIndicator - 进度条组件
class DemoPageState extends State<DemoPage> {

  @override
  Widget build(BuildContext context) {
      return Center(
        child: Column(
          children: <Widget>[

            SizedBox(
              height: 100.0,
            ),

            CircularProgressIndicator(
              //背景色
              backgroundColor: Colors.red,
              //进度值的颜色
              valueColor: AlwaysStoppedAnimation(Colors.yellow),
              //当前进度值
              value: 0.5,
            ),

            SizedBox(
              height: 100.0,
            ),

            LinearProgressIndicator(
              backgroundColor: Colors.red,
              valueColor: AlwaysStoppedAnimation(Colors.yellow),
              value: 0.3,
            ),
          ],
        ),
      );
  }
}
四、Radio
4.1 Radio
单选框,允许用户从一组中选择一个选项。
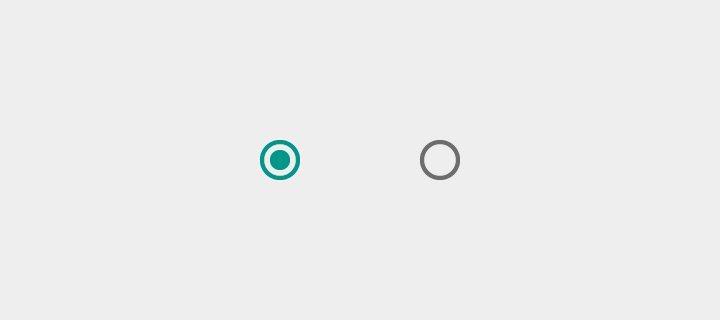
class DemoPageState extends State<DemoPage> {

  int groupValue = 1;

  @override
  Widget build(BuildContext context) {
    return Column(
      //次轴居中
      crossAxisAlignment: CrossAxisAlignment.center,
      mainAxisSize: MainAxisSize.min,

      children: <Widget>[
        Radio(
          //控件颜色
          activeColor: Colors.red,
          //值
          value: 1,
          //当value与groupValue一致时选中
          groupValue: groupValue,
          onChanged: (T){
            this.setState((){
              groupValue = T;
            });
          },
        ),
        Radio(
          value: 2,
          groupValue: groupValue,
          onChanged: (T){
            this.setState((){
              groupValue = T;
            });
          },
        ),
        Radio(
          value: 3,
          groupValue: groupValue,
          onChanged: (T){
            this.setState((){
              groupValue = T;
            });
          },
        ),
      ],
    );
  }
}
4.2 RadioListTitle
比 Radio 组件更丰富些
class DemoPageState extends State<DemoPage> {

  String value = '2';

  onChange(v){
    this.setState((){
      value = v;
    });
  }

  @override
  Widget build(BuildContext context) {
    return Column(
      children: <Widget>[
        RadioListTile<String>(
          //标题
          title: const Text('星期一'),
          //值
          value: '1',
          //右侧图标
          secondary: Icon(Icons.print),
          //当value及groupValue相等时处于选中状态
          groupValue: this.value,
          //是否显示三个
          isThreeLine: false,
          subtitle: const Text('Monday'),
          onChanged: onChange,
        ),
        RadioListTile<String>(
          //标题
          title: const Text('星期二'),
          //值
          value: '2',
          secondary: Icon(Icons.book),
          //当value及groupValue相等时处于选中状态
          groupValue: this.value,
          //是否显示三个
          isThreeLine: false,
          subtitle: const Text('Tuesday'),
          onChanged: onChange,
        ),
      ],
    );
  }
}
五、Scanffold - Material 布局组件
Material Design 布局结构的基本实现。此类提供了用于显示 drawer、snackbar 和底部 sheet 的 API。
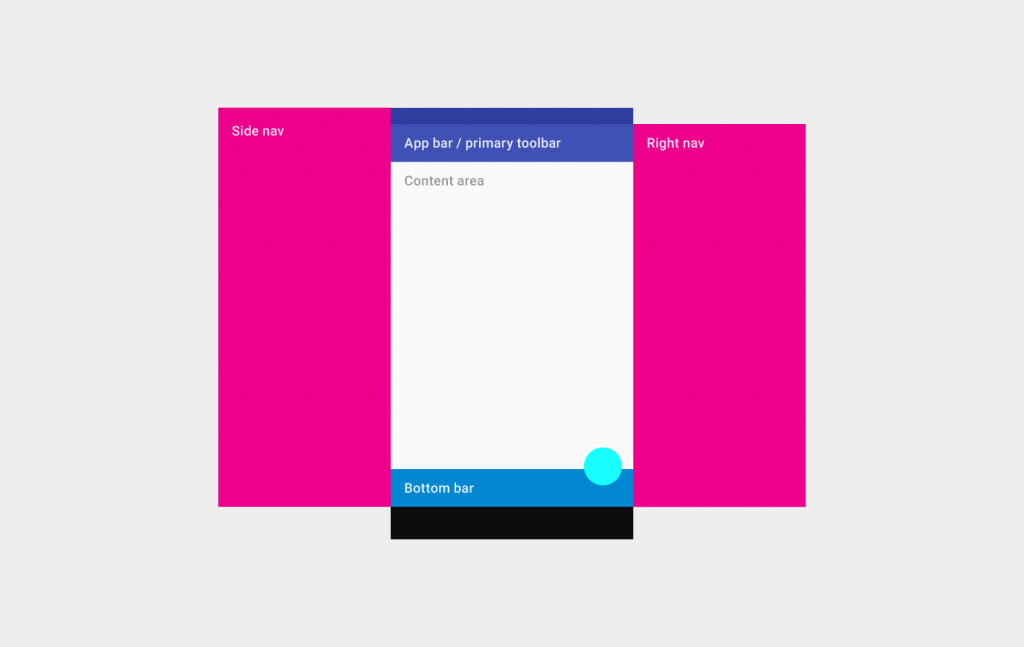
class DemoPageState extends State<DemoPage> {

  @override
  Widget build(BuildContext context) {
    return Scaffold(
      //应用栏
      appBar: AppBar(
        backgroundColor: Colors.red,
        title: Text('标题',style: TextStyle(color: Colors.white),),
        centerTitle: true,
        elevation: 10.0,
        leading: Icon(Icons.home),
        actions: <Widget>[
          Icon(Icons.add),
        ],
        bottom: PreferredSize(
            child: Container(
              height: 50.0,
              child: Center(
                child: Text('显示在标题下面的内容'),
              ),
              decoration: BoxDecoration(
                color: Colors.redAccent,
              ),
            ),
            preferredSize: Size.fromHeight(50.0),
        ),
      ),

      //内容区域
      body: Center(
        child: Text('中间内容部分',style: TextStyle(color: Colors.red,fontSize: 36.0),),
      ),

      //侧边栏 抽屉组件
      drawer: Drawer(
        child: Center(
          child: Container(
            width: 150.0,
            color: Colors.orange,
            child: Text('侧边栏',style: TextStyle(color: Colors.white,fontSize: 24.0),),
          ),
        )
      ),

      //底部 持久化按钮
      persistentFooterButtons: <Widget>[
        Icon(Icons.person),
        Icon(Icons.add),
        Icon(Icons.print),
        Icon(Icons.apps),
        Icon(Icons.chat),
      ],

      //底部 导航按钮
      bottomNavigationBar: BottomNavigationBar(
        currentIndex: 1,
        fixedColor: Colors.redAccent,
        items: <BottomNavigationBarItem>[
          BottomNavigationBarItem(
            icon: Icon(Icons.home),
            title: Text('主页'),
          ),
          BottomNavigationBarItem(
            icon: Icon(Icons.chat),
            title: Text('聊天'),
          ),
          BottomNavigationBarItem(
            icon: Icon(Icons.person),
            title: Text('我的'),
          ),
        ],
      ),

      //底部 FAB按钮
      floatingActionButton: Builder(
          builder: (BuildContext context){
            return FloatingActionButton(
              backgroundColor: Colors.red,
              child: Icon(Icons.add),
              onPressed: (){
                var snackbar = new SnackBar(
                    content: Text('显示SnackBar'),
                  backgroundColor: Colors.red,
                  duration: Duration(
                    milliseconds : 1500,
                  ),
                  action: SnackBarAction(
                      label: '撤销',
                      onPressed: (){}
                  ),
                );

                Scaffold.of(context).showSnackBar(snackbar);
              },
            );
          }
      ),
    );
  }
}
六、Scroll - PageView - 滑动页面
class DemoPageState extends State<DemoPage> {

  @override
  Widget build(BuildContext context) {
    return Container(
      height: 400.0,
      //滚动页面
      child: PageView(
        //翻滚方向
        scrollDirection: Axis.vertical,
        children: <Widget>[
          Container(
            color: Colors.redAccent,
            child: Center(
              child: Text('这是第一页',style: TextStyle(color: Colors.white,fontSize: 28.0),),
            ),
          ),
          Container(
            color: Colors.blue,
            child: Center(
              child: Text('这是第二页',style: TextStyle(color: Colors.white,fontSize: 28.0),),
            ),
          ),
          Container(
            color: Colors.orange,
            child: Center(
              child: Text('这是第三页',style: TextStyle(color: Colors.white,fontSize: 28.0),),
            ),
          ),
        ],
      ),
    );
  }
}
七、Slider - 滑块主题
7.1 Slider - 滑块
滑块,允许用户通过滑动滑块来从一系列值中选择。
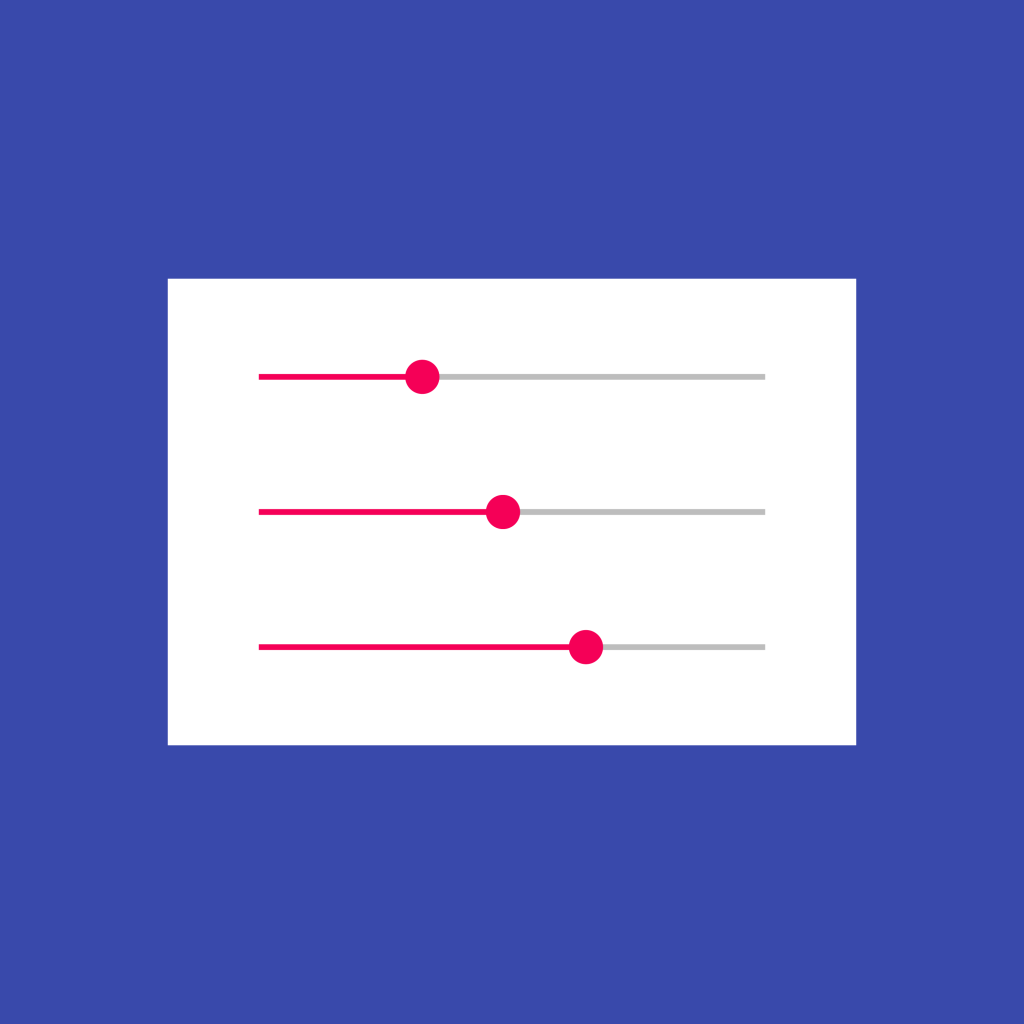
class DemoPageState extends State<DemoPage> {

  double value = 0.0;

  @override
  Widget build(BuildContext context) {
      return Slider(
        //实际进度的位置
        value: value,
        min: 0.0,
        max: 100.0,
        label: '当前音量是:$value',
        //进度中活动部分的颜色
        activeColor: Colors.green,
        //进度中未活动部分的颜色
        inactiveColor: Colors.black,
        //分量的个数 划分成多少块
        divisions: 1000,
        //拖动改变回调
        onChanged: (val){
          setState(() {
            value = val.roundToDouble();
          });
        },
        //每滑动一次结果时回调
        onChangeEnd: (val){
          print('onChangeEnd');
        },
        //每滑动一次开始时回调
        onChangeStart: (val){
          print('onChangeStart');
        },
      );
  }
}
7.2 SliderTheme - 滑块主题
class DemoPageState extends State<DemoPage> {

  double value = 0.0;

  @override
  Widget build(BuildContext context) {
    return SliderTheme(
      data: SliderTheme.of(context).copyWith(
        //已拖动的颜色
        activeTrackColor: Colors.greenAccent,
        //未拖动的颜色
        inactiveTrackColor: Colors.green,

        //提示进度的气泡的背景色
        valueIndicatorColor: Colors.green,
        //提示进度的气泡文本的颜色
        valueIndicatorTextStyle: TextStyle(
          color:Colors.white,
        ),

        //滑块中心的颜色
        thumbColor: Colors.blueAccent,
        //滑块边缘的颜色
        overlayColor: Colors.white,

        //divisions对进度线分割后,断续线中间间隔的颜色
        inactiveTickMarkColor: Colors.white,

      ),
      child: Slider(
        value: value,
        label: '$value',
        min: 0.0,
        max: 100.0,
        divisions: 10,
        onChanged: (val){
          setState(() {
            value = val.floorToDouble();//转化成double
          });
        },
      ),
    );
  }
}
八、Spacing
8.1 AnimatedPadding - 带动画的内边距
class DemoPageState extends State<DemoPage> {
  double paddingValue = 10.0;

  _changePaddingValue() {
    if (paddingValue == 10.0) {
      setState(() {
        paddingValue = 50.0;
      });
    } else {
      setState(() {
        paddingValue = 10.0;
      });
    }
  }

  @override
  Widget build(BuildContext context) {
    return Center(
      child: Column(
        children: <Widget>[
          Container(
            width: 300.0,
            height: 300.0,
            color: Colors.redAccent,
            //带动画的内边距
            child: AnimatedPadding(
              //均衡的内边距
              padding: EdgeInsets.symmetric(
                //水平及垂直方向的边距值
                horizontal: paddingValue,
                vertical: paddingValue,
              ),
              //动画时长
              duration: const Duration(milliseconds: 100),
              //动画类型
              curve: Curves.bounceIn,
              child: Container(
                height: 200.0,
                color: Colors.greenAccent,
              ),
            ),
          ),
          RaisedButton(
            onPressed: _changePaddingValue,
            child: Text('点击切换内边距'),
          ),
        ],
      ),
    );
  }
}
8.2 Padding - 内边距
一个 widget, 会给其子 widget 添加指定的填充。
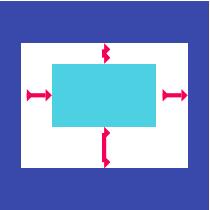
import 'package:flutter/material.dart';

void main() => runApp(new MyApp());

class MyApp extends StatelessWidget {
  @override
  Widget build(BuildContext context) {
    return new MaterialApp(
      title: 'Padding组件',
      home: new Scaffold(
        appBar: new AppBar(
          title: new Text('Padding组件'),
        ),
        body:Center(
          //父容器
          child: Container(
            width: 300.0,
            height: 300.0,
            color: Colors.grey,
            //内边距
            //padding: const EdgeInsets.all(30.0),
            //根据left top right bottom分别设置内边距
            //padding: const EdgeInsets.only(left:10.0, top:20.0,right:30.0, bottom:40.0),
            padding: const EdgeInsets.fromLTRB(10.0, 20.0,30.0, 40.0),
            //子容器
            child: Container(
              color: Colors.green,
            ),
          ),
        ),
      ),
    );
  }
}
九、Stack - 层叠组件
9.1 IndexedStack - 索引层叠组件
从一个子 widget 列表中显示单个孩子的 Stack。IndexedStack
import 'package:flutter/material.dart';

void main() => runApp(new MyApp());

class MyApp extends StatelessWidget {

  final int currentIndex = 2;

  @override
  Widget build(BuildContext context) {
    return new MaterialApp(
      title: 'IndexedStack组件',
      home: new Scaffold(
        appBar: new AppBar(
          title: new Text('IndexedStack组件'),
        ),
        body: IndexedStack(
          //当前显示内容的索引
          index: currentIndex,
          children: <Widget>[
            //圆形头像0
            CircleAvatar(
              backgroundColor: Colors.green,
              radius: 50.0,
            ),
            //添加文本的容器1
            Container(
              decoration: BoxDecoration(
                color: Colors.black12,
              ),
              child: Text(
                'IndexedStack',
                style: TextStyle(
                  fontSize: 20.0,
                  fontWeight: FontWeight.bold,
                  color: Colors.red,
                ),
              ),
            ),
            //添加一个图标2
            Icon(
              Icons.lock,
              size: 48.0,
              color: Colors.green,
            ),
          ],
        ),
      ),
    );
  }
}
9.2 Stack - 层叠组件
可以允许其子 widget 简单的堆叠在一起,谁后面添加,谁在上面。

import 'package:flutter/material.dart';

void main() {
  runApp(MyApp());
}

class MyApp extends StatelessWidget {
  @override
  Widget build(BuildContext context) {
    return MaterialApp(
      //是否显示 debug 标签
      debugShowCheckedModeBanner: false,
      title: "Stack组件",
      home: Scaffold(
        appBar: AppBar(
          title: Text("Stack组件"),
        ),
        body:Column(
          children: <Widget>[
            Container(
              width: 300.0,
              height: 300.0,
              color: Colors.red,
              //层叠组件
              child: Stack(
                //对齐方式
                //子组件对齐方式,同 Container 的 alignment 属性一样的,它指定的是所有子组件的对齐方式,所以建议在只有两个子组件的时候
                //使用,如果有三个及以上的子组件时,建议使用 Positioned 包裹子组件来决定子组件的位置,alignment 的可选值有:
                //AlignmentDirectional.topCenter:垂直靠顶部水平居中对齐
                //AlignmentDirectional.topEnd:垂直靠顶部水平靠右对齐
                //AlignmentDirectional.centerStart:垂直居中水平靠左对齐
                //AlignmentDirectional.center:垂直和水平居中都对齐
                //AlignmentDirectional.bottomEnd:垂直居中水平靠右对齐
                //AlignmentDirectional.bottomStart:垂直靠底部水平靠左对齐
                //AlignmentDirectional.bottomCenter:垂直靠底部水平居中对齐
                //AlignmentDirectional.bottomEnd:垂直靠底部水平靠右对齐
                //也可以像我一样指定具体的偏移量,它是以整个组件的中心为坐标原点,x、y 偏移量取值范围为 [-1,1],如果 x 的偏移量大于 0
                //则表示向右偏移,小于 0 则向左偏移;如果 y 轴的偏移量大于 0 则向下偏移,小于 0 则向上偏移。
                alignment: AlignmentDirectional.center,
                //textDirection: TextDirection.ltr,
                //如何确定没有使用 Position 包裹的子组件的大小,可选值有:
                //StackFit.loose:子组件宽松取值,可以从 min 到 max
                //StackFit.expand:子组件取最大值
                //StackFit.passthrough:不改变子组件约束条件
                //fit: StackFit.loose,
                //超出部分的处理方式
                //overflow: Overflow.clip,
                children: <Widget>[

                  Container(
                    color: Colors.green,
                    width: 100.0,
                    height: 50,
                  ),

                  Text(
                    'Stack组件',
                    textDirection: TextDirection.ltr,
                    style: TextStyle(
                      fontSize: 20.0,
                      fontWeight: FontWeight.bold,
                      letterSpacing: 5.0,
                      color: Colors.white,
                    ),
                  ),

                  //定位方式
                  Positioned(
                    right: 10,
                    bottom: 30,
                    child: Text(
                      'A',
                      style: TextStyle(
                        fontSize: 36.0,
                        color: Colors.white,
                      ),
                    ),
                  ),
                ],
              ),
            ),
          ],
        ),
      ),
    );
  }
}
十、Switch
10.1 AnimatedSwitcher
class DemoPageState extends State<DemoPage> {

  int _count = 0;

  @override
  Widget build(BuildContext context) {
    return Column(
      mainAxisAlignment: MainAxisAlignment.center,
      crossAxisAlignment: CrossAxisAlignment.center,
      children: <Widget>[
        //带动画的Switcher
        AnimatedSwitcher(
          //动画时长
          duration: const Duration(milliseconds: 500),
          //指定过渡动画
          transitionBuilder: (Widget child, Animation<double> animation){
            return ScaleTransition(child: child, scale: animation,);
          },
          //动画显示内容
          child: Text(
            '$_count',
            key: ValueKey<int>(_count),
            style: TextStyle(fontSize: 56.0),
          ),
        ),
        RaisedButton(
          child: const Text('点击+1'),
          onPressed: (){
            setState(() {
              _count +=1;
            });
          },
        ),
      ],
    );
  }
}
10.2 SwitchListTile
class DemoPageState extends State<DemoPage> {
  bool check = false;

  @override
  Widget build(BuildContext context) {
    return SwitchListTile(
      //激活时的颜色
      activeColor: Colors.red,
      value: check,
      onChanged: (bool val){
        this.setState((){
          this.check = val;
        });
      },
      //标题
      title: const Text('是否打印'),
      //添加图标
      secondary: const Icon(Icons.print),
      //子标题
      subtitle: const Text('打印一张照片'),
    );
  }
}
10.3 Switch
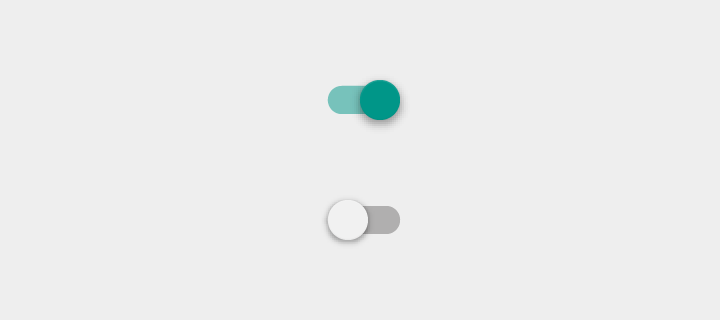
On/off 用于切换一个单一状态。
class DemoPageState extends State<DemoPage> {
  bool check = false;

  @override
  Widget build(BuildContext context) {
    return Column(
      children: <Widget>[
        Switch(
          //决定Switch打开还是关闭
          value: this.check,
          onChanged: (bool value) {
            this.setState(() {
              this.check = !this.check;
            });
          },
        ),
        Switch.adaptive(
          value: this.check,
          //激活时原点的颜色
          activeColor: Colors.red,
          onChanged: (bool value) {
            this.setState(() {
              this.check = !this.check;
            });
          },
        ),
        SizedBox(
          width: 100.0,
          height: 30.0,
          child: Switch(
            //决定Switch打开还是关闭
            value: this.check,
            //激活时原点的颜色
            activeColor: Colors.red,
            //激活时滑轨的颜色
            activeTrackColor: Colors.orange,
            //激活时按钮的背景图片
            activeThumbImage: NetworkImage('https://flutter.io/assets/homepage/news-1-2ab8ef4d7570c3e4f481fd839365fbfc11ea97bdb7fd9fb5fd38aa3348149136.png'),


            //非激活时原点的颜色
            inactiveThumbColor: Colors.green,
            //非激活时滑轨的颜色
            inactiveTrackColor: Colors.yellow,
            //非激活时按钮的背景图片
            inactiveThumbImage: NetworkImage('https://flutter.io/assets/homepage/news-2-599aefd56e8aa903ded69500ef4102cdd8f988dab8d9e4d570de18bdb702ffd4.png'),


            onChanged: (bool value) {
              this.setState(() {
                this.check = !this.check;
              });
            },
          ),
        ),

      ],
    );
  }
}
十一、Table - 表格组件
为其子 widget 使用表格布局算法的 widget。Table
import 'package:flutter/material.dart';

void main() => runApp(new MyApp());

class MyApp extends StatelessWidget {
  @override
  Widget build(BuildContext context) {
    return new MaterialApp(
      title: 'Table组件',
      home: new Scaffold(
        appBar: new AppBar(
          title: new Text('Table组件'),
        ),
        body: Center(
          child: Container(
            //表格
            child: Table(
              //所有列宽
              columnWidths: const {
                //列宽
                0: FixedColumnWidth(100.0),
                1: FixedColumnWidth(200.0),
                2: FixedColumnWidth(50.0),
              },
              //表格边框样式
              border: TableBorder.all(
                color: Colors.green,
                width: 2.0,
                style: BorderStyle.solid,
              ),
              children: [
                TableRow(
                  //第一行样式 添加背景色
                  decoration: BoxDecoration(
                    color: Colors.grey,
                  ),
                  children: [
                    //增加行高
                    SizedBox(
                      height: 30.0,
                      child: Text('姓名',style: TextStyle(color: Colors.white,fontWeight: FontWeight.bold),),
                    ),

                    Text('性别',style: TextStyle(fontWeight: FontWeight.bold),),
                    Text('年龄',style: TextStyle(fontWeight: FontWeight.bold),),
                  ]
                ),
                TableRow(
                    children: [
                      Text('张三'),
                      Text('男'),
                      Text('20'),
                    ]
                ),
                TableRow(
                    children: [
                      Text('小红'),
                      Text('女'),
                      Text('28'),
                    ]
                ),
                TableRow(
                    children: [
                      Text('李四'),
                      Text('男'),
                      Text('28'),
                    ]
                ),
                TableRow(
                    children: [
                      Text('机器猫'),
                      SizedBox(
                        width: 88.0,
                        height: 88.0,
                        child: Image.asset('assets/cat.jpeg'),
                      ),

                      Text('26'),
                    ]
                ),
              ],
            ),
          ),
        ),
      ),
    );
  }
}
十二、Text
12.1 Text
单一格式的文本。

import 'package:flutter/material.dart';

void main() => runApp(MyApp());

class MyApp extends StatelessWidget {
  @override
  Widget build(BuildContext context) {
    return MaterialApp(
      title: 'Text组件',
      home: Scaffold(
        appBar: AppBar(
          title: Text('Text组件'),
        ),
        body:Center(
          child:Column(
            children: <Widget>[

              Text(
                'hello',
                style: TextStyle(
                  color: Colors.red,
                  fontSize: 48.0,
                  decoration: TextDecoration.lineThrough,
                  decorationColor: Colors.black,
                ),
              ),


              Text(
                '下划线',
                style: TextStyle(
                  color: Colors.green,
                  fontSize: 48.0,
                  decoration: TextDecoration.underline,
                  decorationColor: Colors.black,
                ),
              ),

              Text(
                '虚线上划线+23号+倾斜',
                style: TextStyle(
                  color: Colors.orange,
                  fontSize: 23.0,
                  decoration: TextDecoration.overline,
                  decorationStyle: TextDecorationStyle.dashed,
                  decorationColor: Colors.red,
                ),
              ),

              Text(
                '36号+加粗',
                style: TextStyle(
                  color: Colors.blue,
                  fontSize: 36.0,
                  fontStyle: FontStyle.italic,
                  fontWeight: FontWeight.bold,
                  decorationColor: Colors.black,
                ),
              ),

              Text(
                '自定义字体',
                style: TextStyle(
                  color: Colors.blue,
                  fontSize: 36.0,
                  fontFamily: 'myfont',
                ),
              ),
            ],
          ),
        ),
      ),
    );
  }
}
12.2 RichText
富文本组件,表示多种样式的文本组件。RichText
import 'package:flutter/material.dart';

void main() {
  runApp(
      new MaterialApp(
        title: '富文本组件',
        home: new TextDemo(),
      )
  );
}

class TextDemo extends StatelessWidget {
  @override
  Widget build(BuildContext context) {
    return new Center(
      child: RichText(
          text: TextSpan(
            text: 'I ',
            style: TextStyle(fontSize:38.0,fontWeight: FontWeight.bold,),
            children: <TextSpan>[
              TextSpan(text: 'want ', style: TextStyle(fontSize:32.0,fontWeight: FontWeight.bold, color: Colors.red)),
              TextSpan(text: ' study', style: TextStyle(fontSize:32.0,fontStyle: FontStyle.italic)),
              TextSpan(text: ' flutter', style: TextStyle(fontSize:32.0,fontStyle: FontStyle.italic,color: Colors.green,)),
            ],
          ),

      ),
    );
  }
}
十三、Theme - MaterialApp - Material 应用
一个方便的 widget,它封装了应用程序实现 Material Design 所需要的一些 widget。

import 'package:flutter/material.dart';

void main() => runApp(MaterialAppDemo());

/*
- title : 在任务管理窗口中所显示的应用名字
- theme : 应用各种 UI 所使用的主题颜色
- color : 应用的主要颜色值(primary color),也就是安卓任务管理窗口中所显示的应用颜色
- home : 应用默认所显示的界面 Widget
- routes : 应用的顶级导航表格,这个是多页面应用用来控制页面跳转的,类似于网页的网址
- initialRoute :第一个显示的路由名字,默认值为 Window.defaultRouteName
- onGenerateRoute : 生成路由的回调函数,当导航的命名路由的时候,会使用这个来生成界面
- onLocaleChanged : 当系统修改语言的时候,会触发å这个回调
- navigatorObservers : 应用 Navigator 的监听器
- debugShowMaterialGrid : 是否显示 Material design 基础布局网格,用来调试 UI 的工具
- showPerformanceOverlay : 显示性能标签
- checkerboardRasterCacheImages 、showSemanticsDebugger、debugShowCheckedModeBanner 各种调试开关
*/

class MaterialAppDemo extends StatelessWidget {

  @override
  Widget build(BuildContext context) {

    return MaterialApp(
      //debugShowMaterialGrid: true,
      showPerformanceOverlay: true,
      title: '应用名称',
      color: Colors.green,
      home: DemoPage(),
      theme: ThemeData(
        primaryColor: Colors.redAccent,
      ),
//      initialRoute: '/second',
//      routes: <String,WidgetBuilder>{
//        '/':(BuildContext context) => FirstScreen(),
//        '/second': (BuildContext context) => SecondScreen(),
//      },
    );
  }

}


class DemoPage extends StatefulWidget {
  @override
  State<StatefulWidget> createState() {
    return new DemoPageState();
  }
}

class DemoPageState extends State<DemoPage> {

  @override
  Widget build(BuildContext context) {
    return Container(
      height: 400.0,
      //滚动页面
      child: PageView(
        //翻滚方向
        scrollDirection: Axis.vertical,
        children: <Widget>[
          Container(
            color: Colors.redAccent,
            child: Center(
              child: Text('这是第一页',style: TextStyle(color: Colors.white,fontSize: 28.0),),
            ),
          ),
          Container(
            color: Colors.blue,
            child: Center(
              child: Text('这是第二页',style: TextStyle(color: Colors.white,fontSize: 28.0),),
            ),
          ),
          Container(
            color: Colors.orange,
            child: Center(
              child: Text('这是第三页',style: TextStyle(color: Colors.white,fontSize: 28.0),),
            ),
          ),
        ],
      ),
    );
  }
}


class FirstScreen extends StatelessWidget {
  @override
  Widget build(BuildContext context) {
    return new Scaffold(
      appBar: new AppBar(
        title: new Text('First Screen'),
      ),
      body: new Center(
        child: new RaisedButton(
          child: new Text('First Screen'),
          onPressed: (){

          },
        ),
      ),
    );
  }
}

class SecondScreen extends StatelessWidget {
  @override
  Widget build(BuildContext context) {
    return new Scaffold(
      appBar: new AppBar(
        title: new Text('Second Screen'),
      ),
      body: new Center(
        child: new RaisedButton(
          child: new Text('Second Screen'),
          onPressed: (){

          },
        ),
      ),
    );
  }
}
